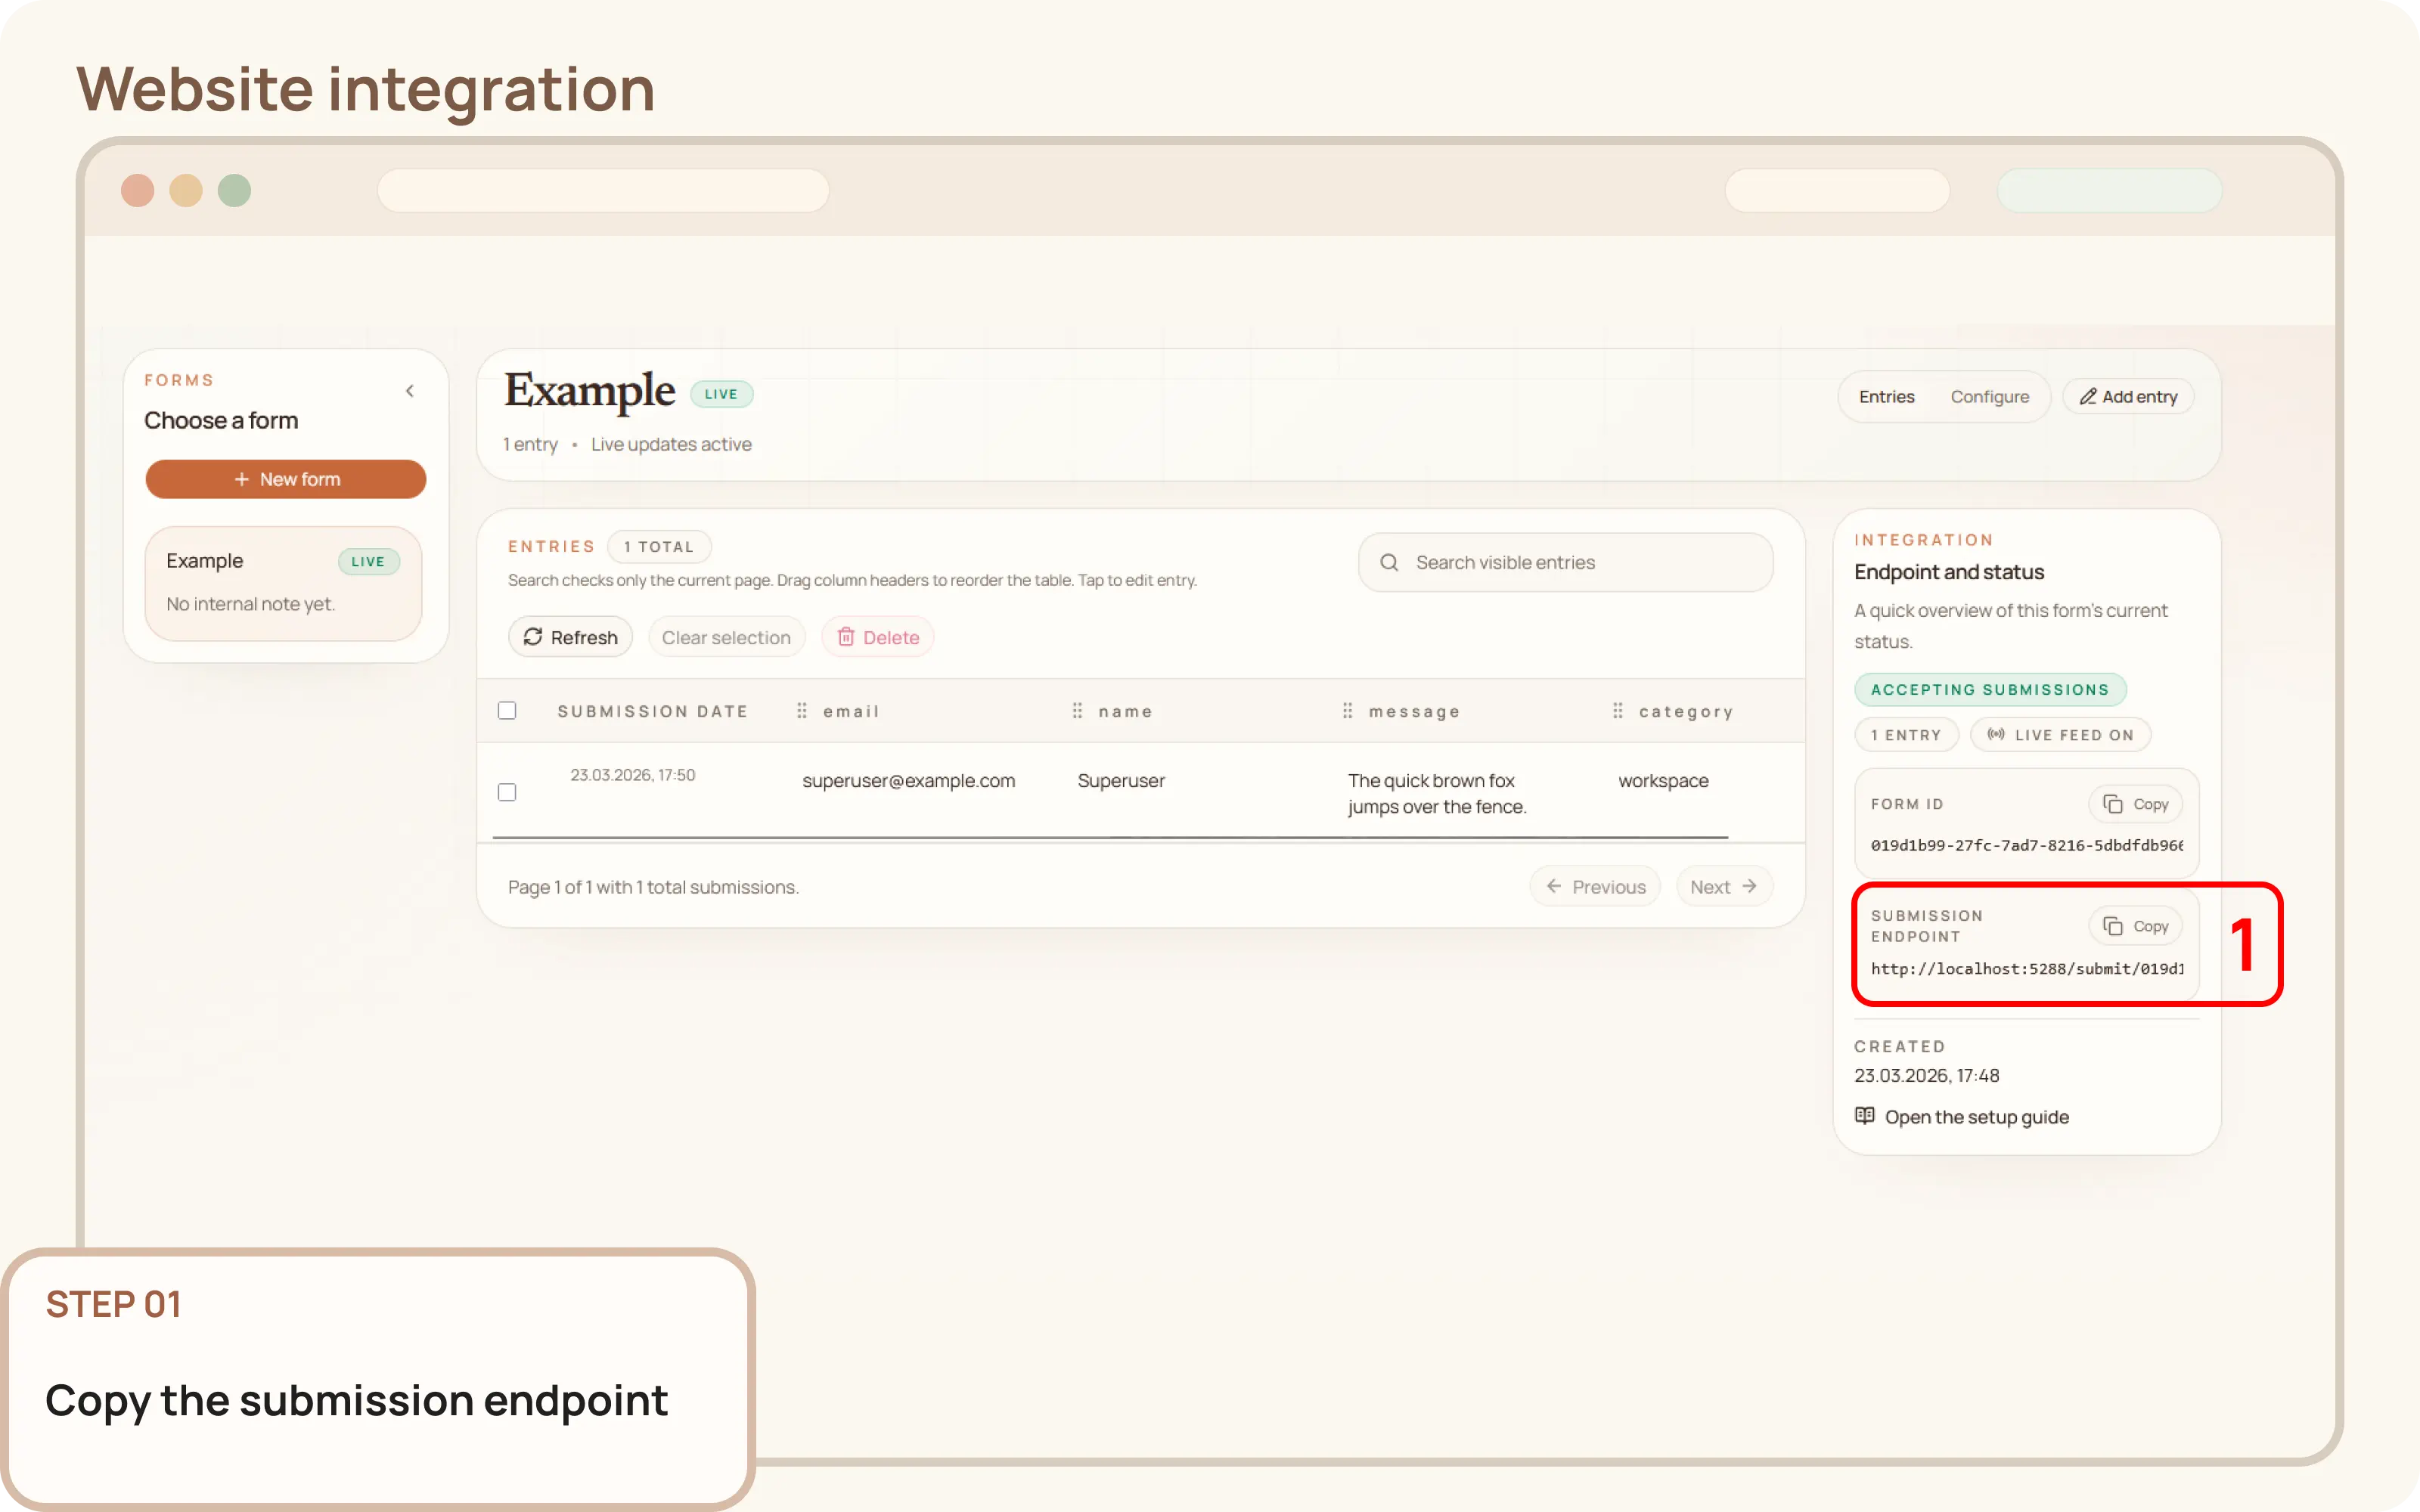
Copy the submission endpoint
- Go to
Workspace > Formsand select the form you want to connect. - In the form details panel, you will find the submission endpoint. Copy this URL.
The endpoint URL will have the following format:
https://api.mountly.io/submit/<form-id>