Open the form creation wizard
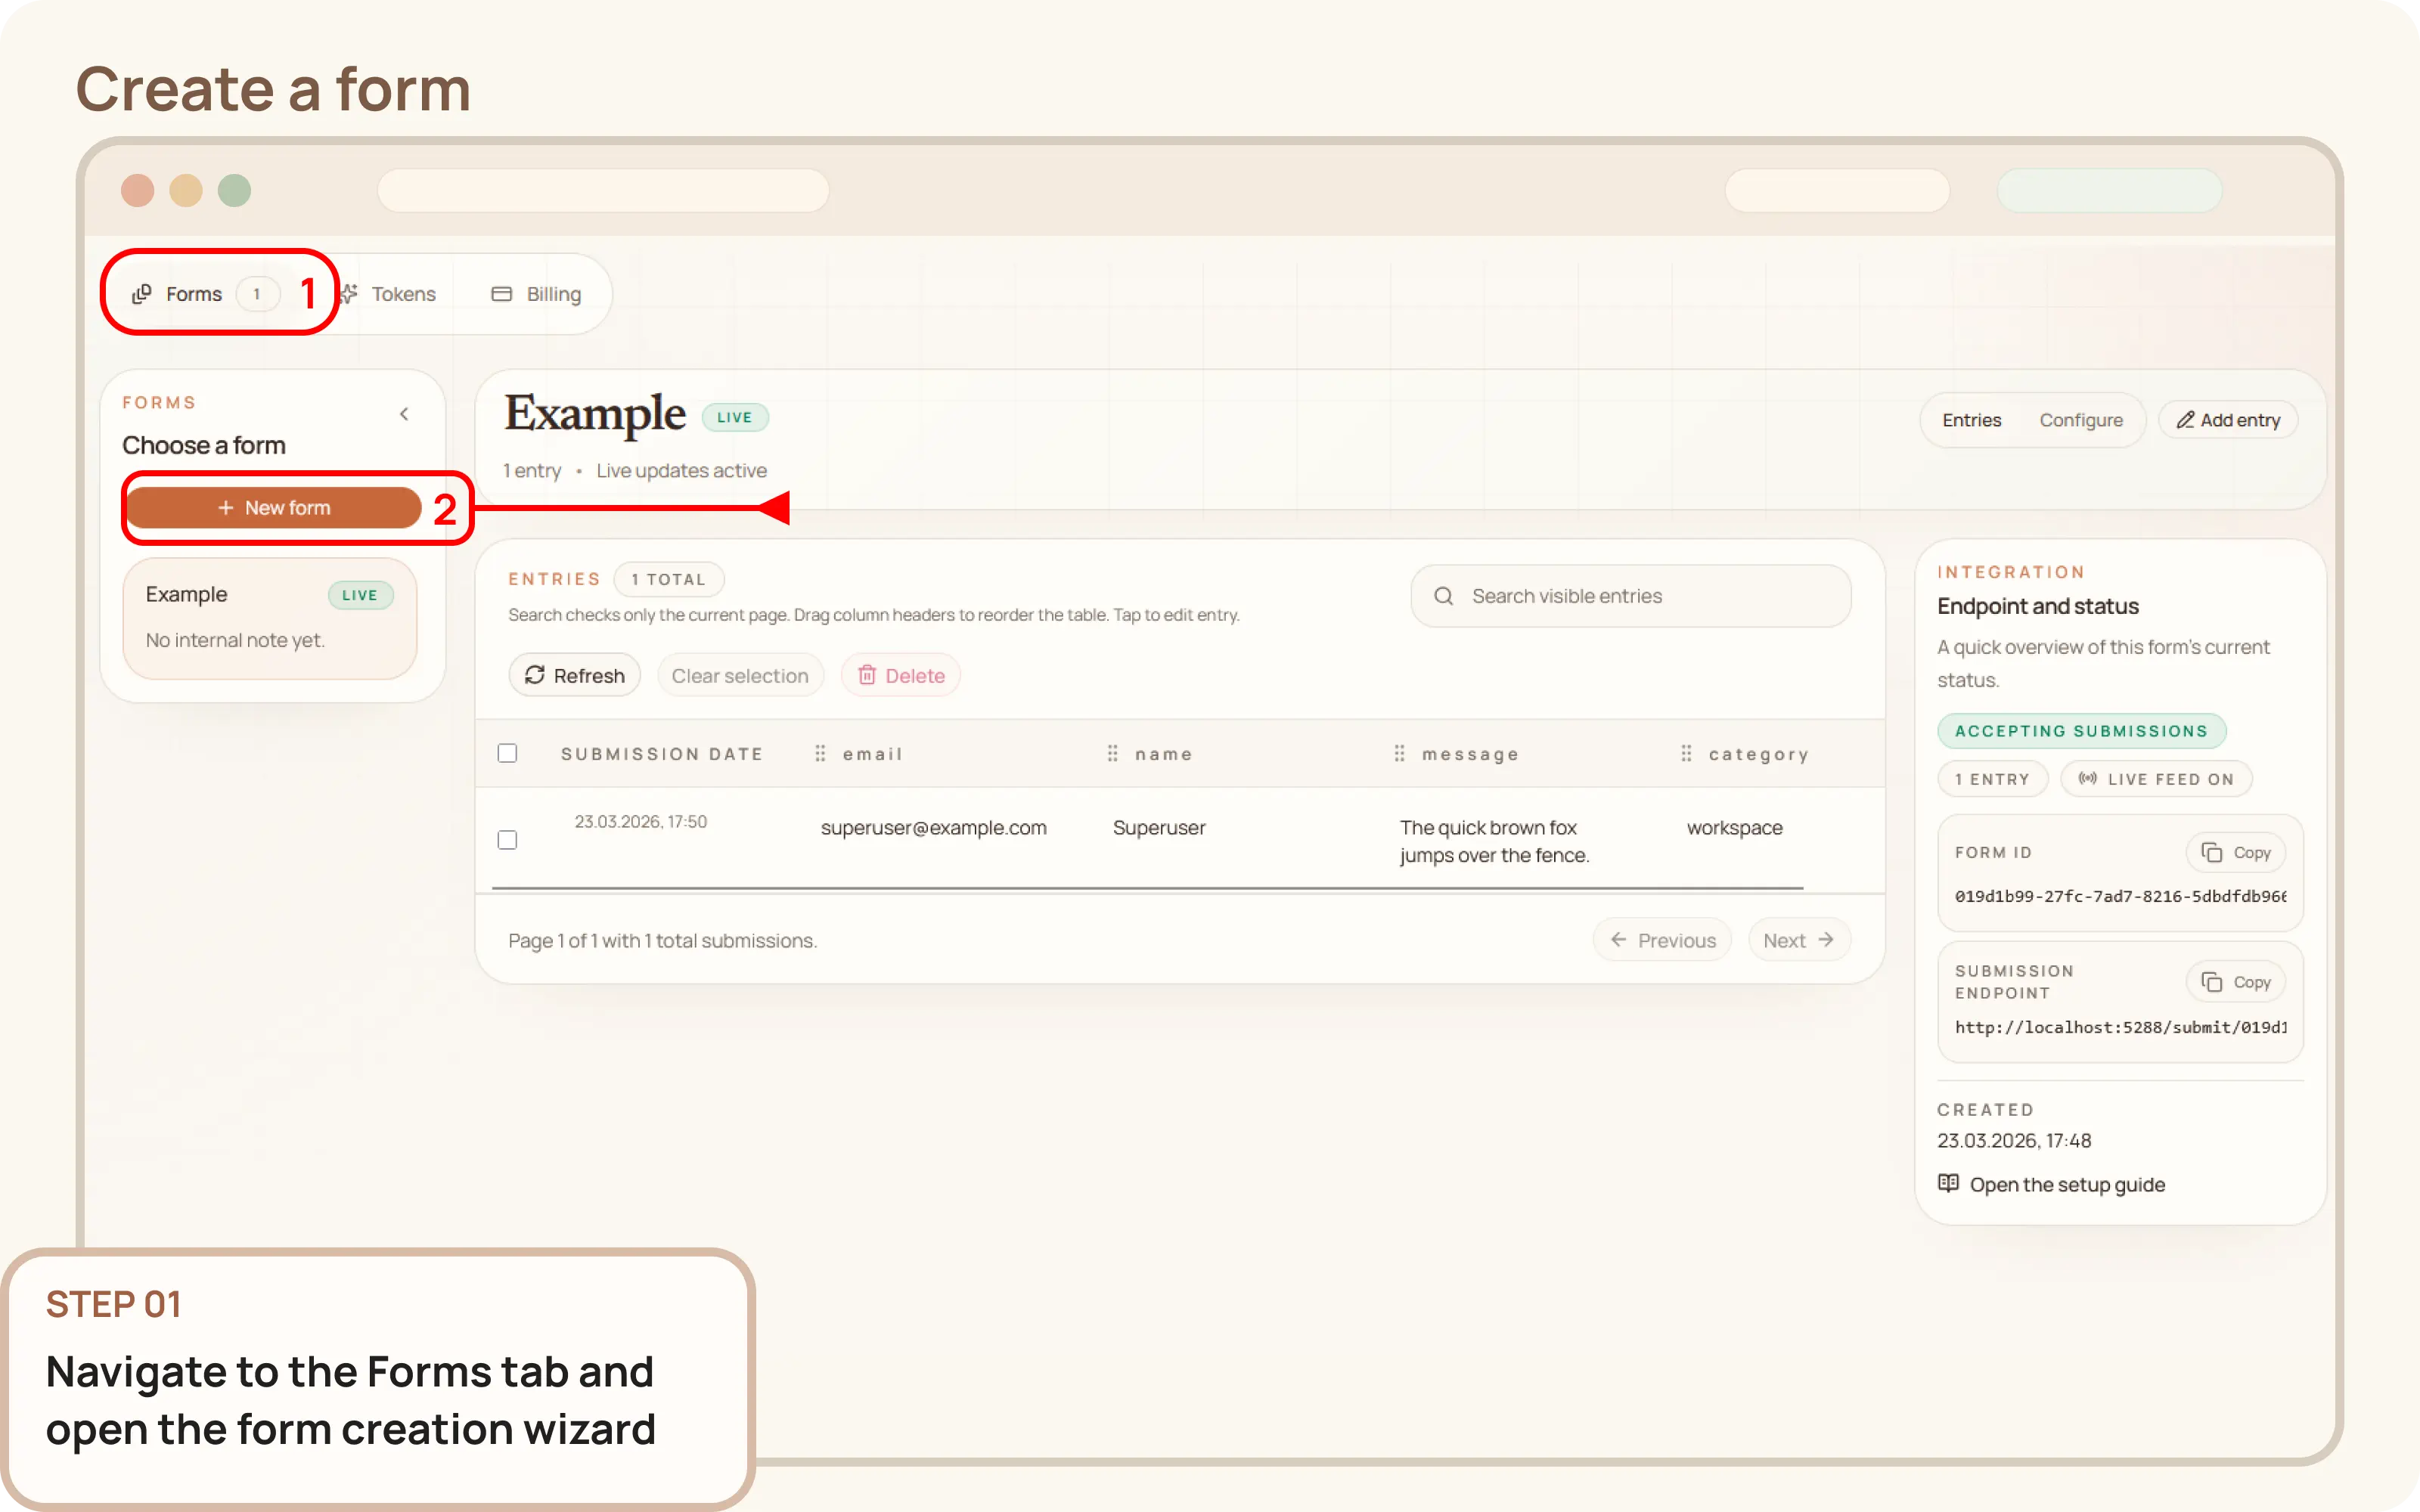
Navigate to Workspace > Forms.
- If no forms exist, the creation wizard will be shown automatically.
- If forms are already present, click on
+ New form.
Documentation
Guides and public API reference
Documentation
This guide explains how to create a new form from the Mountly dashboard. A Form is needed to start accepting submissions for your website.
Navigate to Workspace > Forms.
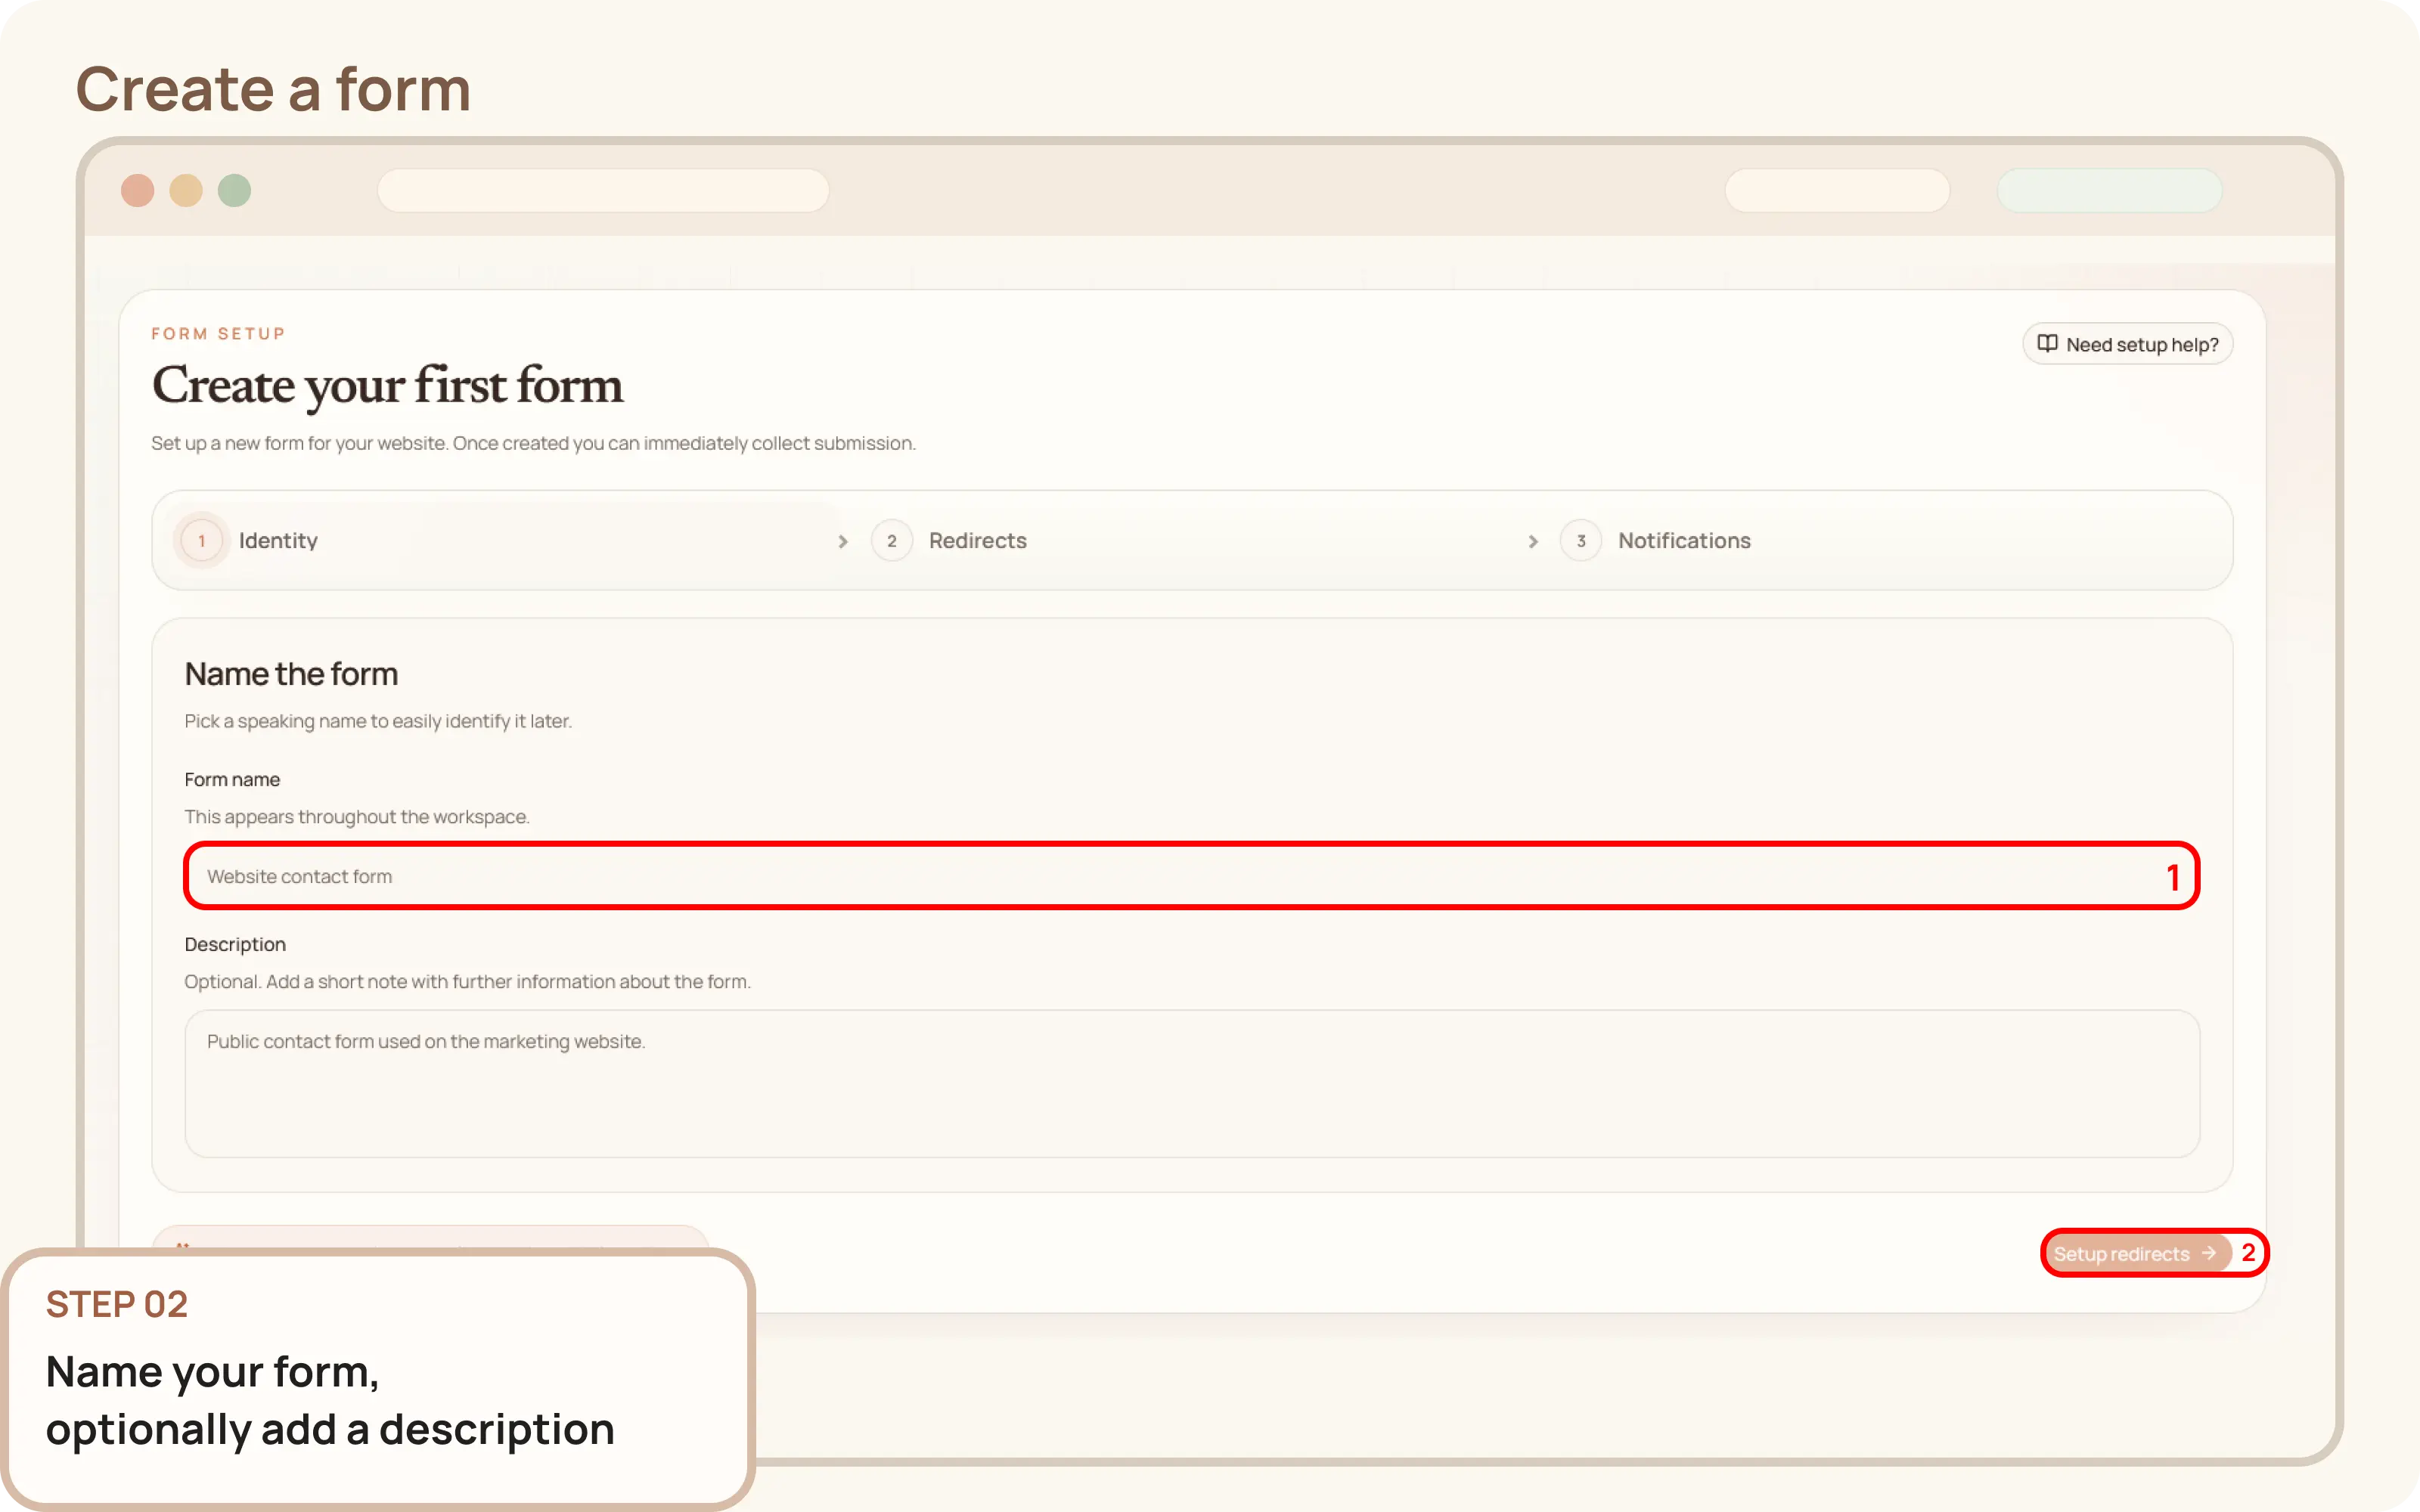
+ New form.Provide the basics for your new form:
Choose a name that will be clear and distinct, especially if you plan to have multiple forms.
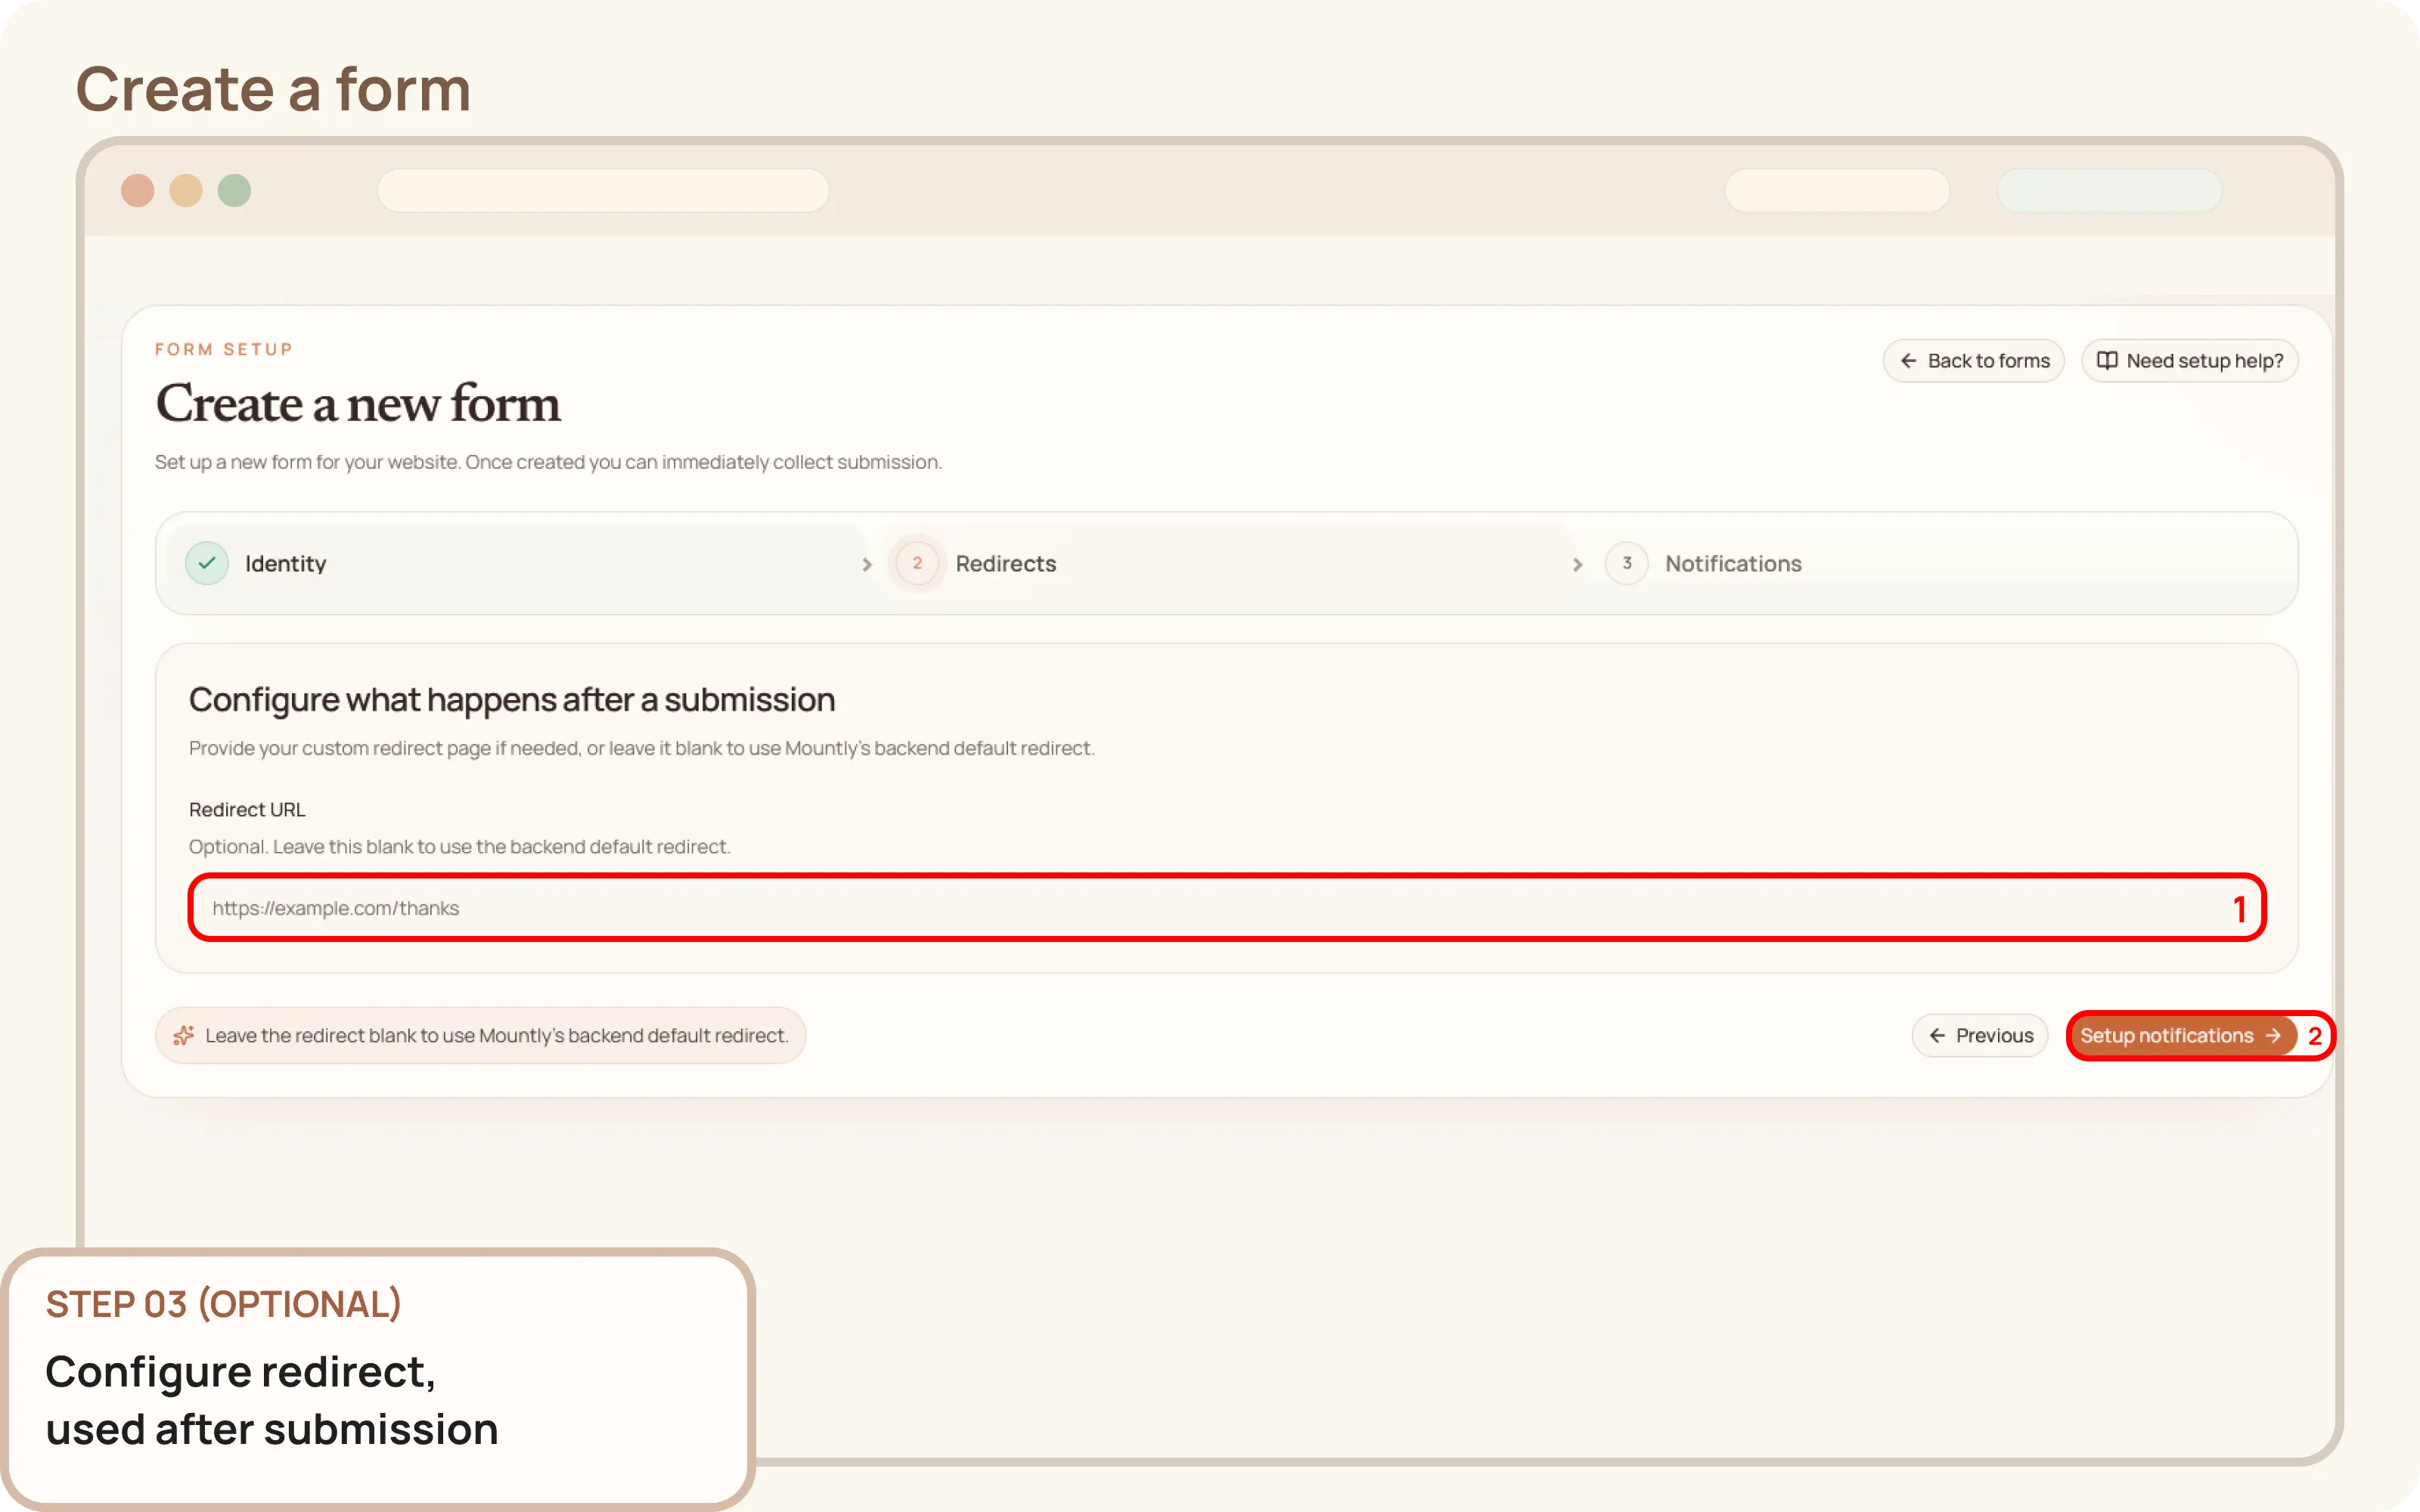
In the Redirects step, specify what should happen after a submission.
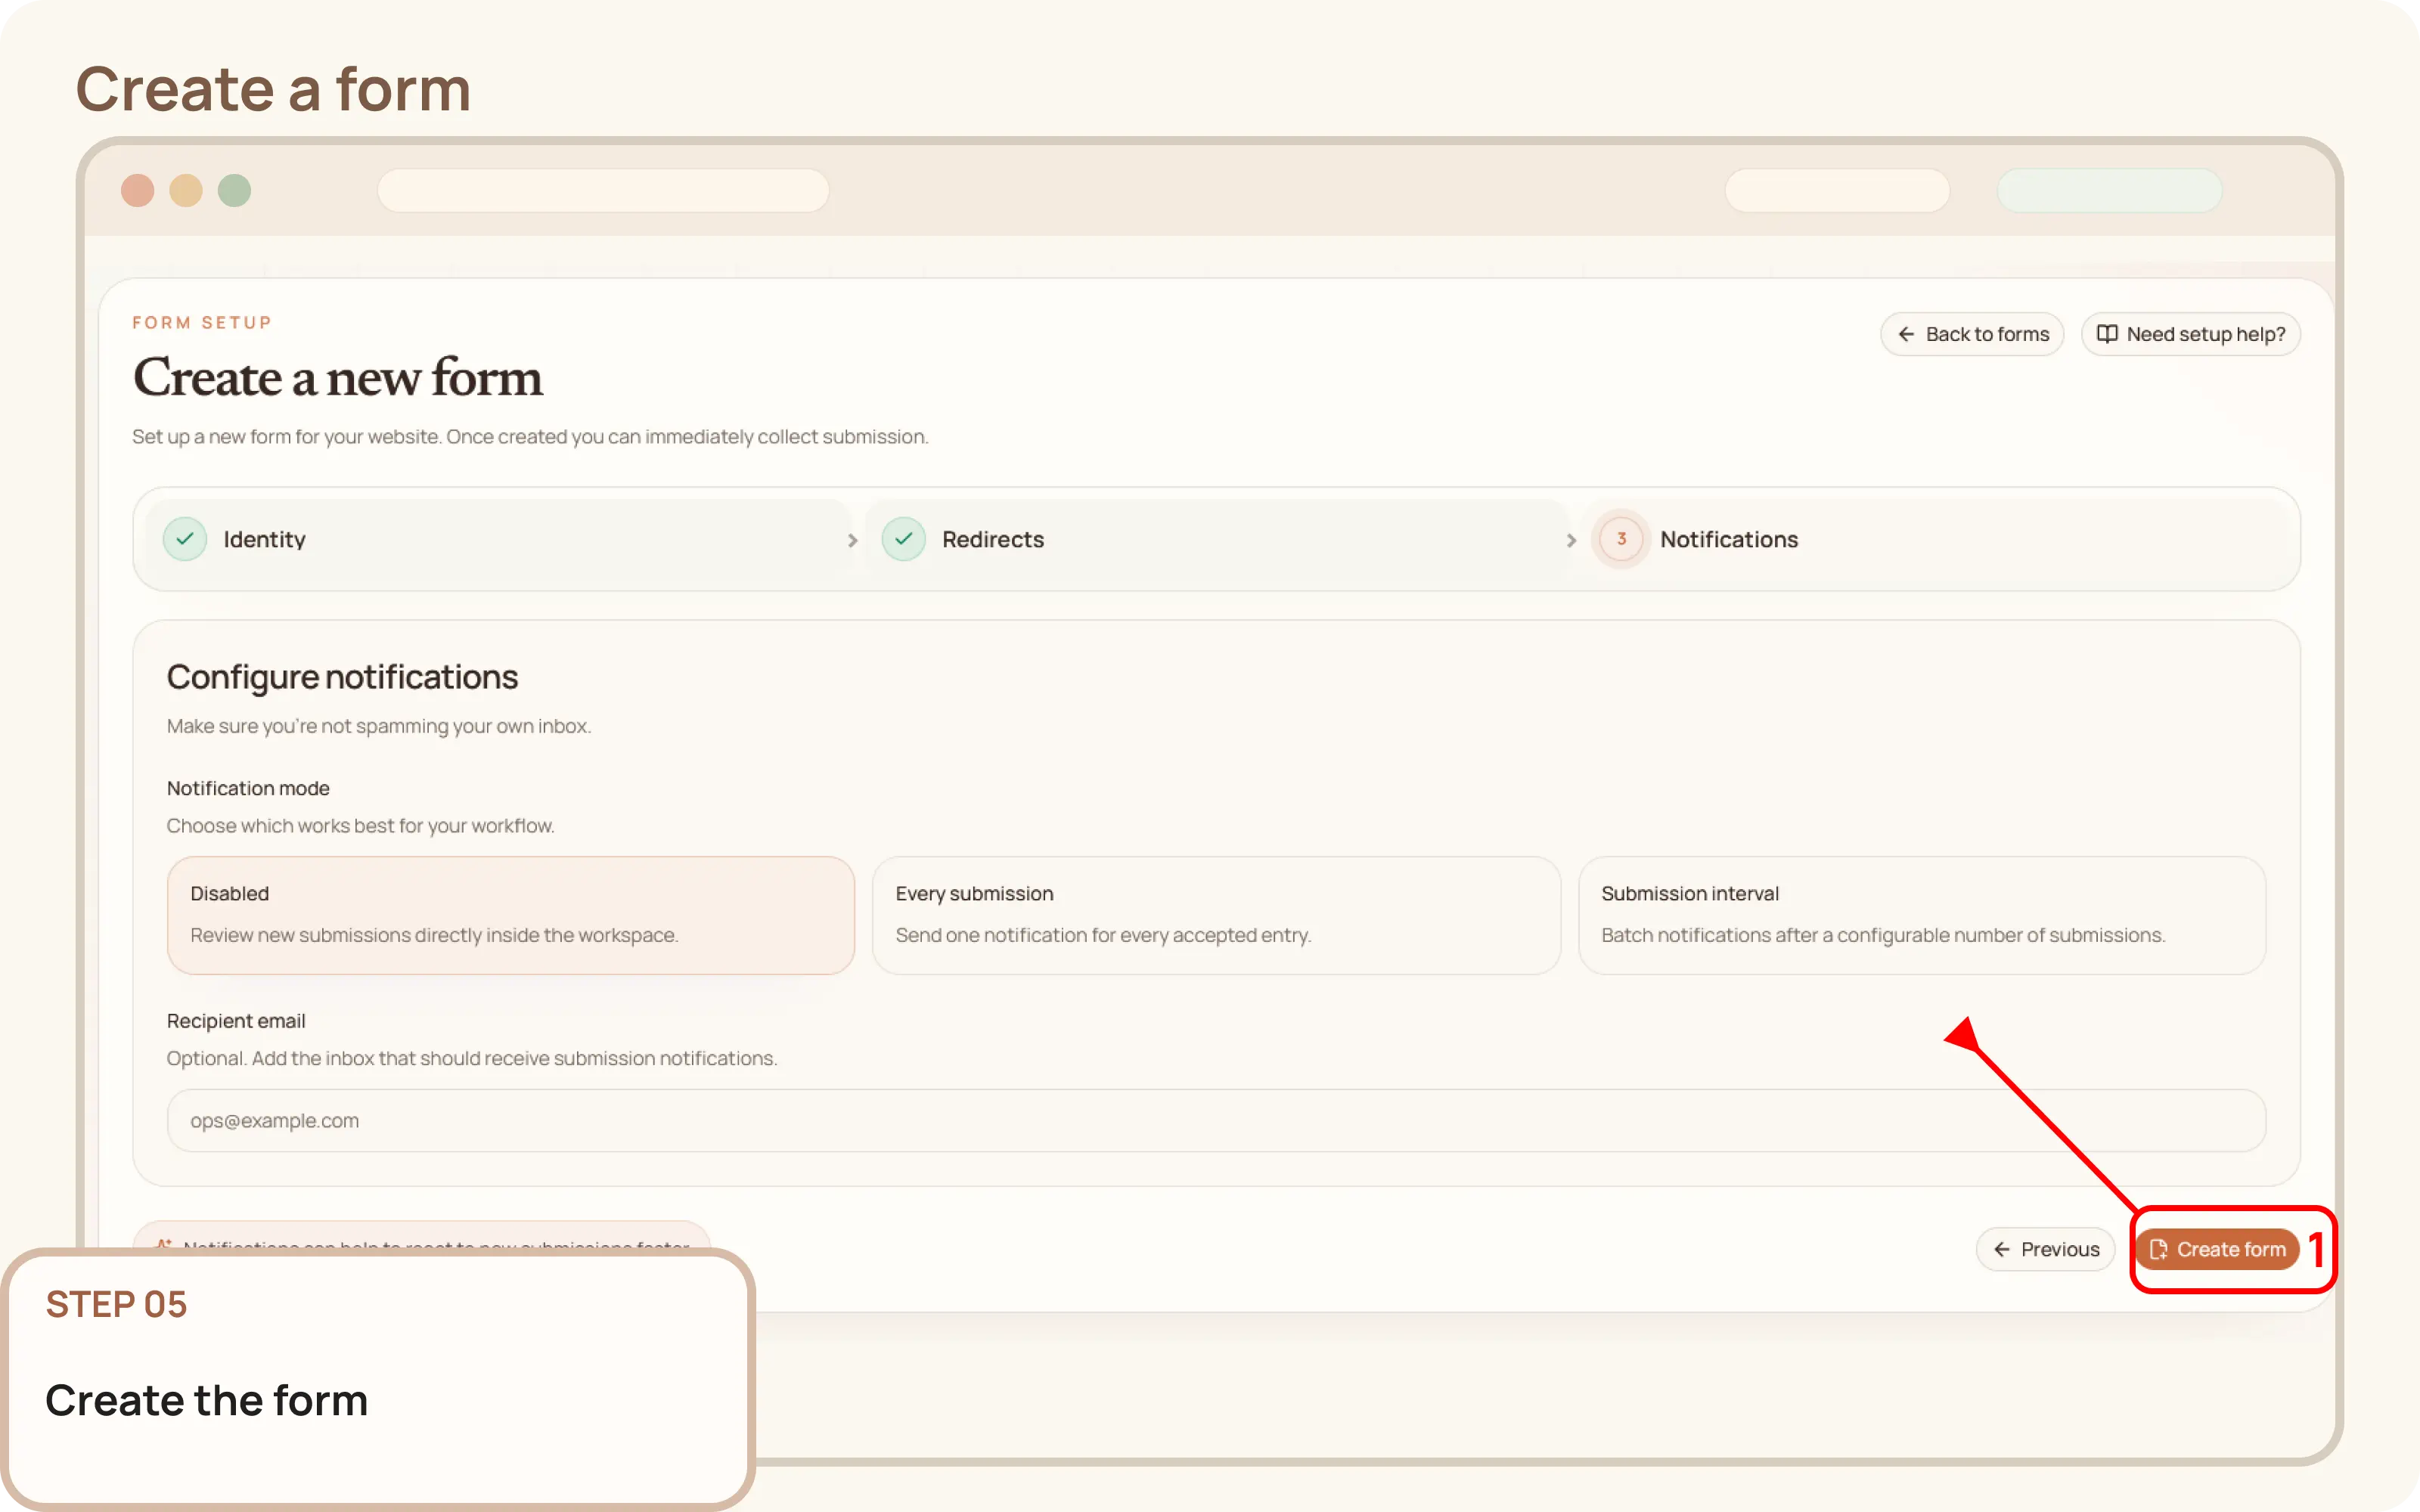
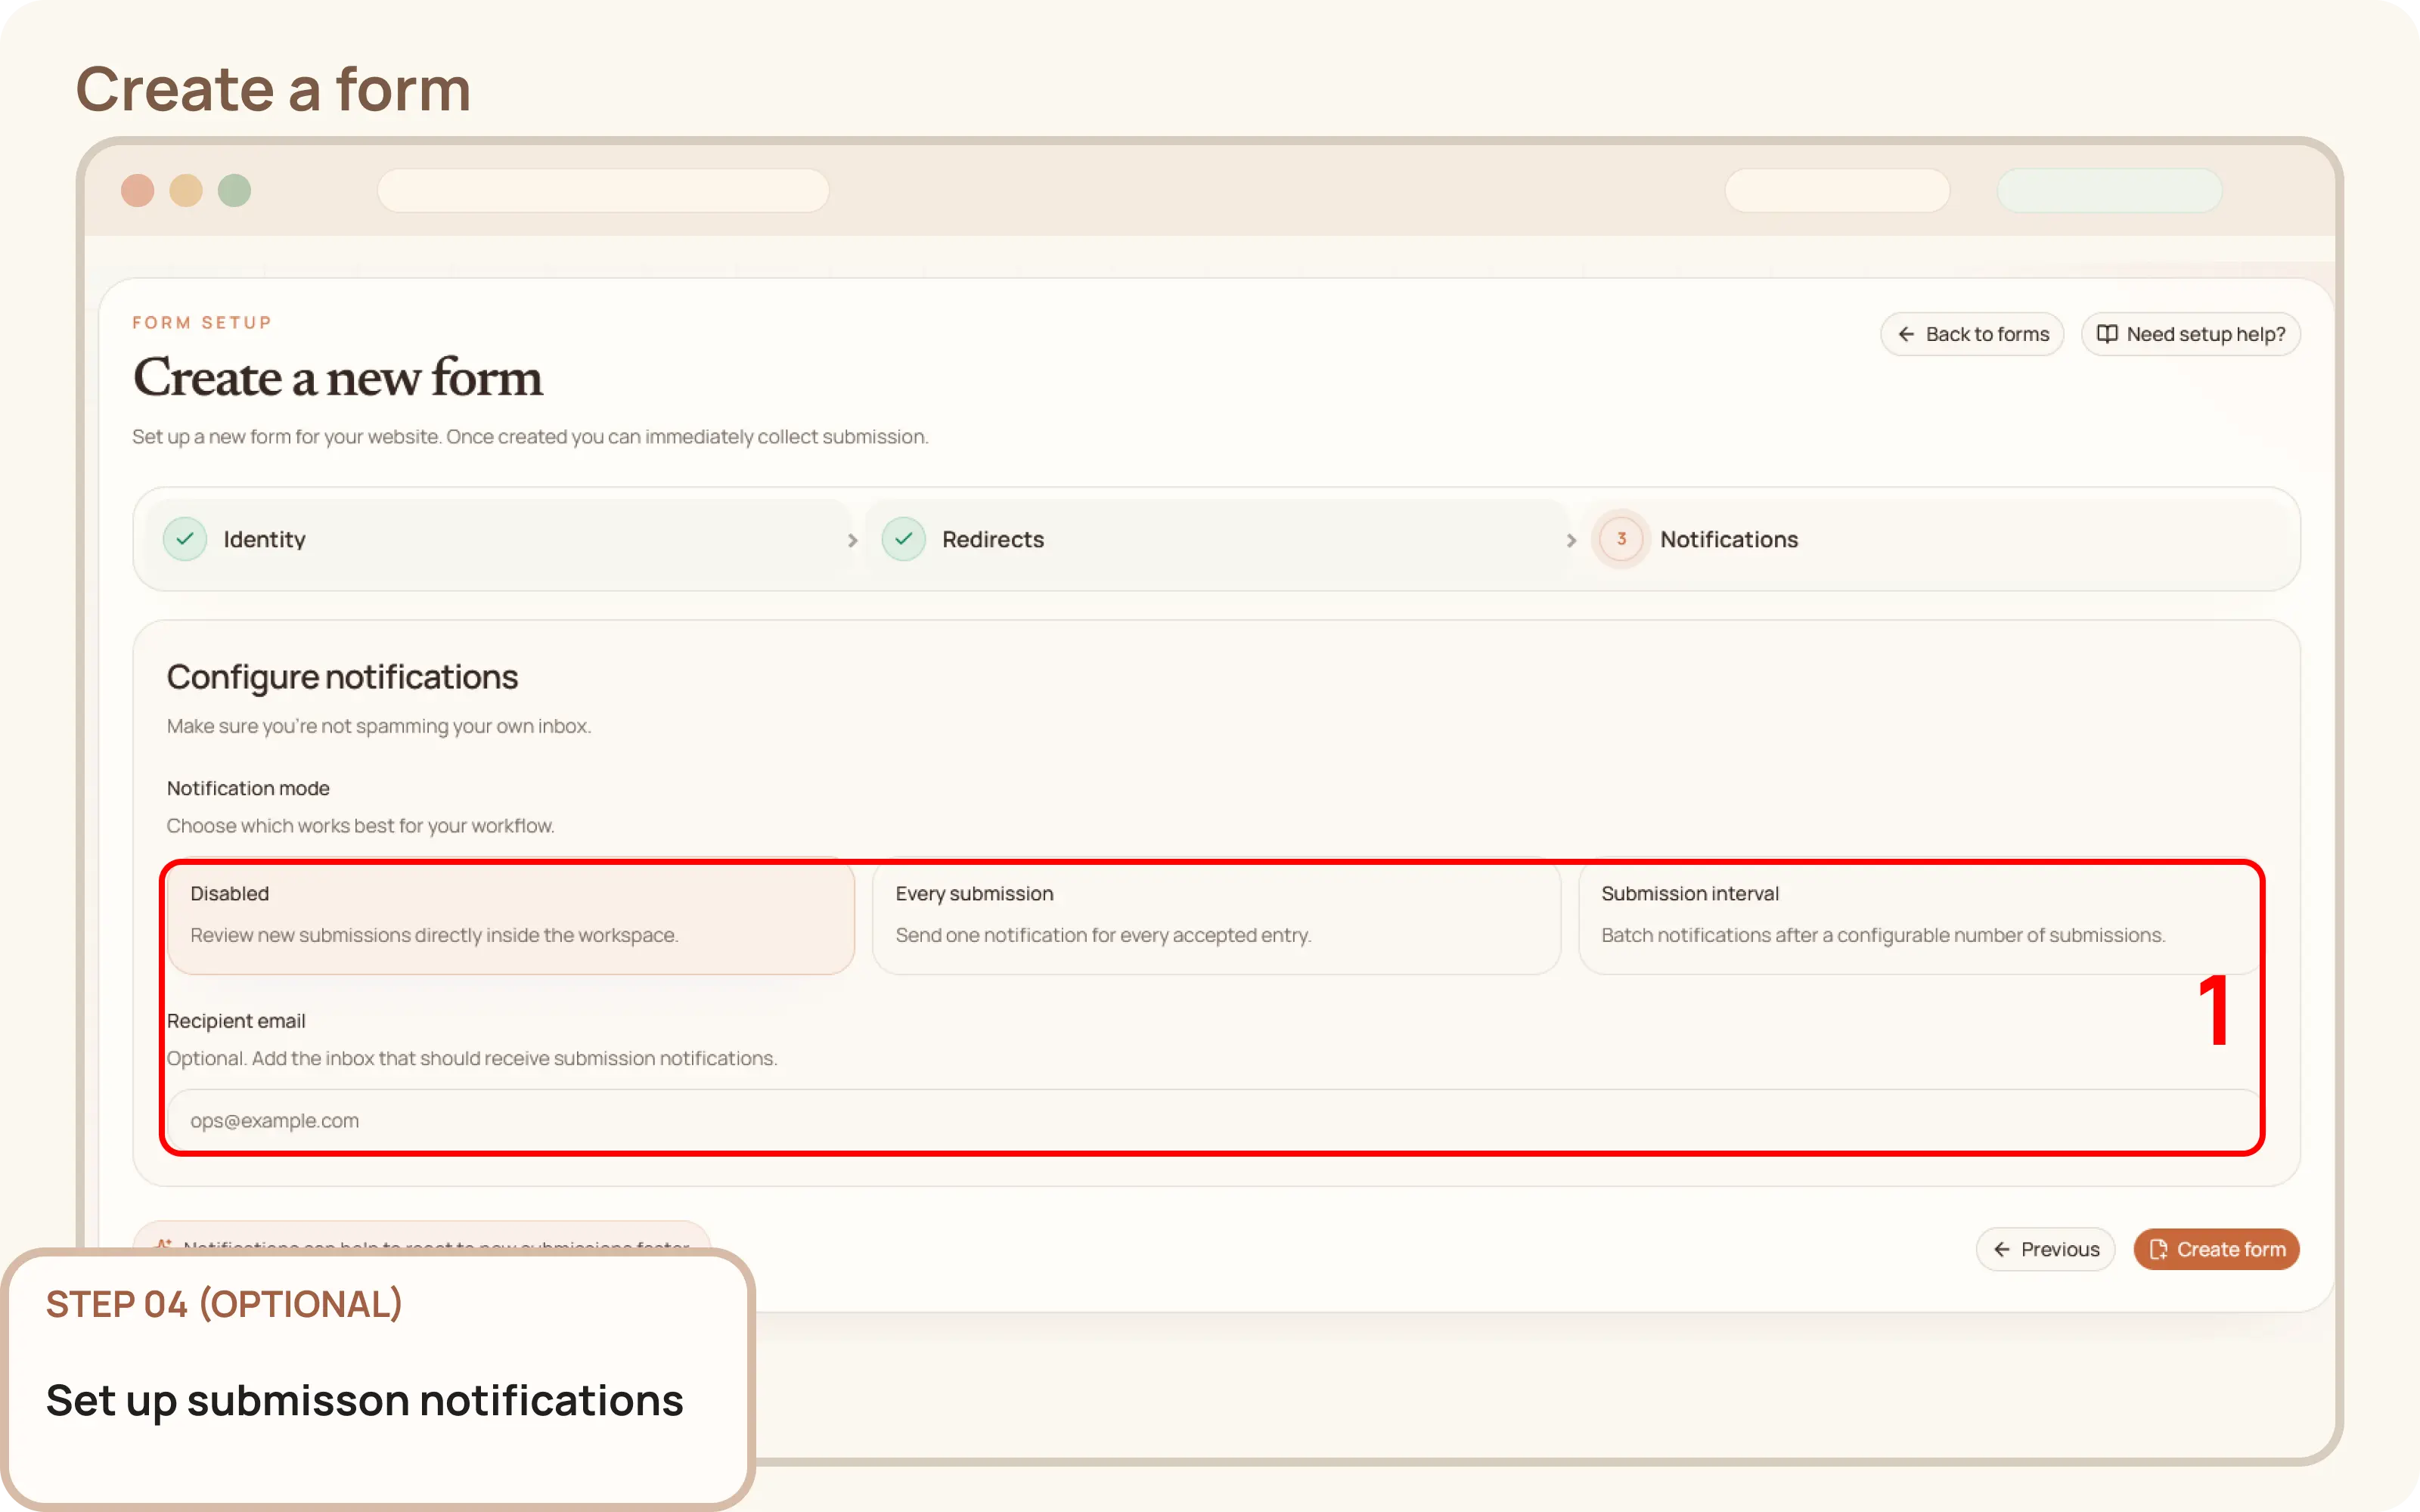
In the Notifications step, configure the email notification preferences.
If notifications are enabled, ensure the recipient email and interval settings are configured correctly.
Click Create form. Once saved, verify that the new form appears in the list and that its status indicates it is ready to accept submissions.
The form is now created, but it must be connected to your website's frontend to go live.